Tuesday, March 23, 2021

Inspiration: Eggs

When it comes to Easter, chocolate eggs are the first thing many think of.  Certainly I love them!  Eggs are a symbol of fertility and across the world they are linked to Spring for the return of life it brings.  In Christianity, they are linked to the resurrecution of Jesus.  Eating eggs was not allowed in Holy Week, the week before Easter, so any laid were painted and saved before they were given to children.  The Victorians started giving gifts at Easter in egg shaped boxes.  Chocolate eggs were first developed in France and Germany during the 19th Century and eventually hollow eggs were developed.  

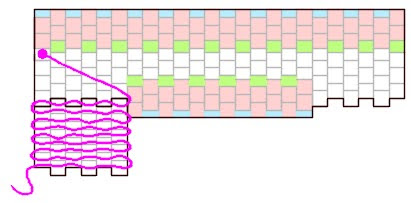
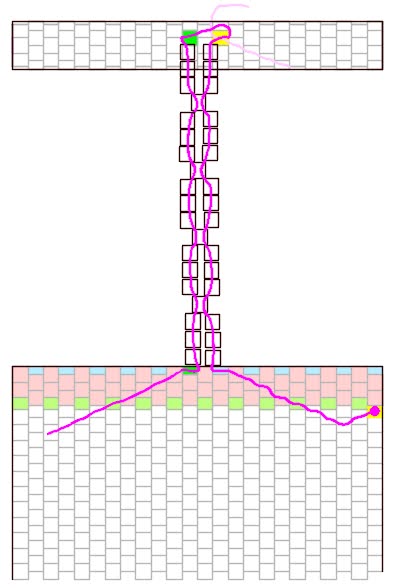
Given the symbolism of eggs and the widespread tradition of decorating them, it's not surprising that there are so many different styles and traditions.  In the Ukraine, decorated eggs are call psyanka and are decorated using a wax resist and the decorations are written more than painted.  The Ukraine egg decorating is not all about psyanka though as there are a huge range of techniques used.  These include scratching eggs to reveal the white underneath, adding wax and embedding beads in it and dyeing eggs with small leaves attached.  More recently, carved eggs and lazy eggs have become more common where lazy eggs are decorated with stickers or shrink wrap.

Ukrainian egg decorating techniques go back to pre-Christian times and there are many superstitions.  They protect from evil spirits, lightening and fire but have to be disposed of properly as they can be misused by witches and this involves grinding the shell up but they should never be stood upon as this will give great ill health.  Witches could use them as part of a ritual to dry up a cow's milk or to cause illness in people.  The cloth used to dry Psyanka was also special and could be used to cure skin illnesses.  A large family might create up to 60 in the run up to Easter and many would be gifted or kept for different reasons.  Some to the priest, for children, others were given by unmarried ladies to the unmarried men, others placed on family graves, some kept to add to the coffins of any family who died, still more kept for protection in the house, placed in the mangers, under beehives, under chicken nests and taken to the pastures by shepherds.

With such a long and complicated history, it's not surprising that different villages had slightly different techniques and patterns.  The symbolism of the patterns and colours used is very well developed!  Following the introduction of Christianity, the patterns became less about magic and more about Christian themes, but there are literally thousands of traditional designs.

One group in western Ukraine believe there is a giant serpent that is chained to a cliff who seeks to destroy the world and he is only prevented from doing so by Psyanka.  Each year he sends out minions to see how many have been created and the tightness of his chains depends on the number... More Christian legends suggest that Mary Magdalene took eggs with her as a meal when she went to anoint Jesus body and their plain shells were transformed in to rainbow colours.  Simon, who helped carry Jesus cross, left his possessions by the road to do so and when he returned his eggs had turned in to Psyanka.

Many Eastern European countries have similar traditions, including Belarus, Bulgaria, Czechoslovakia, Poland and Slovakia.  It's not surprising really that egg decoration was taken to excess by the Romanov family, as so many other things were...  Faberge eggs are famous and are the pinnacle of egg art with the incredible craftsmanship and expensive materials.  Alexander III and Nicholas II commissioned Peter Carl Faberge to create 52 eggs as Easter gifts for their wives and mothers.  The Faberge family left Russia following the revolution in 1918 and the trademark has since been sold several times with egg related jewellery still made.

One of the most incredible artforms involving eggs is egg carving.  I first saw this on Kirstie Allsop's Christmas programme where one contestant carved an ostrich egg.  There is something incredible about the delicate ethereal shapes that be created in this way.  Atilla Szabo is a retired Hungarian diplomat who has taken to creating the most delicate carvings....

The egg is a form also celebrated in dragon egg creation and there are amazing eggs created in a wide variety of ways.  Game of Thrones really increased the appeal of dragon eggs!

I have collected some egg art images together on pinterest which you can see here.

Friday, March 12, 2021

Tutorial: Beaded Toggle with Rolled End to Bracelet (Part 2)

This tutorial looks at the the other end of the clasp where the loop the toggle passes through is situated.  It is a direct follow on from last weeks tutorial and is not meant to be read by itself.


Mirroring

If you want your bracelet to look the same on both sides where there is a pattern, you will need to mirror the pattern.  The highlighted beads are all part of the rolled edge, corresponding to the peach beads in other diagrams.

The blue row of beads would be the last row of your pattern, say for example this was row 180 in the pattern.  The next row would be exactly the same as row 179 as shown by the two red highlighted rows.  The next row would be the same as row 178 as shown by the green beads.  The last row to be added would be the same as row 177 as shown by the pink highlighted beads.  Finally you would make the roll by stitching in to the yellow beads as if they were the next row.  This leaves the blue beads on the very end.


Rolled Edge to Bracelet End

Begin by creating the piece of beadwork that will go across the very end of the bracelet.  This is 24 columns across and 15 rows deep.  Leave a decent tail thread.  The beads highlighted peach are going to form the rolled edge at the very end of the bracelet.  

The technique is exactly the same as for the rolled edge in part 1 of this tutorial.  The diagram below shows the thread path, but if you need this broken down in to steps, please refer to part 1 of this tutorial.


First Rolled Edge to Clasp Hole

This rolled edge is slightly different as it makes a bit more of a fold back than a cylinder, which gives the bracelet a front and a back.  To the front, the beadwork will appear almost flat while to the rear the extra beads give it two distinct ridges.  The folds are structural to help the clasp hole keep its shape.


Switch to the tail thread, leaving the rolled edge thread in place as you will still need it.

Stitch through the first six columns and then create a tab of peyote twelve columns wide and four rows deep.

The rolled edge again uses the last eight rows but in this instance, some of the rows are part of the wider piece of beadwork as shown below.

Zip up the two sides of the rolled edge as before.

Finish the thread off in your usual way.


First Side to the Clasp Hole

Take the thread you used to create the rolled edge for the end of the bracelet and start creating the first side of the clasp hole by creating a peyote tab six columns wide.  Do not stitch through any of the rolled edge beads highlighted peach.  Make the tab 9 rows deep.

Set this piece of beadwork to one side without finishing the thread off as you will need it to attach it to the bracelet.


Second Rolled Edge to Clasp Hole

Take the remaining thread at the end of the bracelet and work in six columns and then create a tab of peyote twelve columns wide and four rows deep.

The peach highlighted beads show the ones that will create the rolled edge.  Create the rolled edge by zipping the two sides together in exactly the same way as before.  Make sure it folds the same way as the other rolled edge to the clasp hole.  The side you have already created should sit on the left hand side of the bracelet.  


Second Side to the Clasp Hole

Stitch across the beadwork in order to begin the second side.

Create a tab 9 rows deep and six columns across, do not pass through any of the beads associated with rolled edge.


Joining the Two Parts of the Clasp

Position the two parts of the clasp as shown.  It should be pretty clear that the two sides are setup ready to join the clasp together with the threads positioned correctly!

Zip the two joins together without stitching into the rolled edges of the clasp hole and then finish your threads in your normal way.

And now your clasp is finished!


Tuesday, March 9, 2021

Inspiration: Trust

Trust is a really important concept and fundamental to our society.  Everyday, our society functions on trust.  We might trust the sun to rise each day, that there will be food to eat, that our loved ones will be there.  It's about confidence and believe.  I know that my money has a certain value for instance.  I am lucky to live in the UK where life has a certainty to it and there are many things I can trust in.  Life is not so certain everywhere or at all times and change inevitably happens.

I remember in history at school we studied Germany and we learnt that inflation was completely out of control there in the early 1920s.  Germany had huge war debt and printed money that was not backed by gold or any other resource.  The value of their currency fell and a loaf of bread which cost 160 Marks in 1922 cost 200,000,000,000 Marks in 1923.  People literally used wheelbarrows to transport money.  Workers were often paid twice per day as prices were changing so quickly that they quickly became worthless and money was literally not worth the paper it was printed on.  Nobody trusted the currency.

Life has been pretty stable in places like the UK for a long time and we have gotten pretty used to that which has made the events of the last year or so particularly hard to adjust to.  Life was particularly uncertain at the beginning as few of living people in the UK had been through a pandemic like this.  It caught people by surprise...  Too much certainty, too much trust can be bad for us because we still need to maintain a certain flexibility, the ability to judge....  For instance, it's better to trust a builder with the job of putting up an extension who has a good reputation and reviews rather tan someone who turns up on your doorstep offering to do the job for a very low cash price...

I remember that I began to see articles on Covid and realised it was serious when China started building hospitals at a speed that was incredible.  By September 2020 the official death toll stood at 4634 in China and it just seems incredible to me and completely unbelievable....  Such a death toll seems very unrealistic when compared to the effect Covid has had on other countries who at least knew it existed when it reached their shores and were prepared to fight it.  China denied it's existence for some time and when they accepted the reality of it, their reaction was on a scale that suggests it was a much larger problem.  I once heard a rumour, friend of a friend of a friend that 1,000,000 telephone numbers were deactivated  following China's first wave.  Trust is an issue...

From the point of the hospitals being built, my ears were pricked and as soon as cases were identified in Italy, it was clear to me that Covid was out and it was going to have a huge impact on our lives, though I couldn't comprehend the scale.  I remember asking my boss if they had started thinking about homeworking and she looked at me like I was crazy and asked what for.  A week later I tried again and enquired about a mobile so I could check my emails and even in that short time, the situation had changed and they looked at me like I was perhaps panicking a little but was not completely crazy.  Meanwhile Covid was spreading in Italy and tourists from all over Europe were visiting for the school break, completely unaware, before they took Covid home with them.  

I think one of the things really impacted by Covid has been trust.  On the one hand, something really bad has happened and life goes on, our systems continue to function and our country is definitely taking steps to keep tings going.  On a smaller scale, communities have really come together to look after people.  On a less positive note, while some sorts of crime are much lower, the streets being empty has allowed some negative behaviours to flourish.  Theft of dogs has risen considerably and I find that the streets feel just a little bit less safe, even in the middle of the day.

But Trust is so important to me...  I trust that everything will be OK.  That no matter what happens I will do my best and I will cope...  that should the worst happen, things will still be OK.  It's a nebulous sort of thing, trust at that level.  Everything will be exactly as it's supposed to be... I still have a responsibility to take action, it isn't a blind trust.  I guess it's much like faith.

I chose blues for this design because it feels like a river, that carries you along.  Little eddies in the current...

Friday, March 5, 2021

Tutorial: Beaded Toggle with Rolled End to Bracelet (Part 1)

This is similar to a beaded clasp I made for my Bright Tartan Bracelet but this tutorial gives a generic version of the clasp.


Toggle

The toggle is made from a piece of beadwork with the same number of columns as your bracelet.  In this example there are 24 columns.  Begin by making a piece of beadwork 12 rows deep so that the beadwork has six beads on both ends.

The beadwork is then turned into a cylinder by zipping up the first and last rows.  Begin by threading through the high bead on the opposite end of the beadwork, highlighted in yellow.

Take the the thread over the beadwork and thread through the first high bead, highlighted green in the diagram below.  Keep the thread going in the same direction as the join.  Pull tight and the two sides of the beadwork will pull together, eventually slotting together to make a cylinder with no obvious join although right now it probably looks like a pea pod mostly split open.

Thread through the second bead on the second side of the beadwork, now highlighted yellow.  The beadwork is shown as flat for clarity.

Thread through the second high bead on the first side, now highlighted green.  Keep pulling the thread tight so that he cylinder forms and the beads pull together like the teeth of a zipper.

From here, just keep going, the diagram below shows the thread path.  Make sure the thread always takes the short path between the two sides of the beadwork, if it takes the long path it will be wrapped around the outside of the cylinder when you have finished and will be visible.

Stitch through eleven beads to reach near the centre of the cylinder toggle.  This will be the point at which you begin the stalk to attach the toggle to the bracelet.


Rolled End of bracelet

The rolled end gives the end of the bracelet additional strength so that it keeps its shape better.  It's effectively a little cylinder but a smaller one than the toggle.  You only want to consider the beads that will be part of the cylinder as shown in the diagram below where the cylinder beads are highlighted in peach.  Either add a new thread or use an existing thread.

Stitch through from the edge through the first bead highlighted yellow in the peach section.

Stitch through the first high bead on the end of the bracelet, now highlighted green.  As you pull it tight it will start to form the cylinder at the end of the bracelet and the yellow and green highlighted beads should start to zip together.  give a gentle tug if they don't.

Stitch through the next bead highlighted yellow in the peach section.

Stitch through the second high bead on the end of the bracelet, now highlighted green.

From here, just keep going, the diagram below shows the thread path. Make sure you keep to the beads highlighted peach until the cylinder is complete.

Now the cylinder is completed, it's fine to stitch through any of the beads from the white or peach section of the beadwork.  Stitch into the bead highlighted yellow, which was part of the white section.

The last diagram shows the rolled edge with the light green and blue beads being part of the peach cylinder section.  The light green beads are partially visible as they are underneath.  The light blue beads are the ones on the end.  Stitch through so that you are eleven beads in from the edge, exiting a bead on the very end.  This will be an anchor point for the stalk connecting the rolled end of the bracelet to the cylinder toggle.

Note:  If you want to have both sides of your bracelet the same, you will need to mirror your choices on the rolled edge.  This is included in next weeks tutorial.

Stalk (Connects bracelet to toggle)

The stalk needs to be long enough that when you bend the toggle along its length, the toggle end does not reach the bracelet.  So the stalk needs to be longer than half the length of the toggle.  In this case the toggle was 24 beads long so I made the stalk 19 beads long.

Using the thread exiting the end of the bracelet, pick up 19 beads, stitch in to the bead highlighted yellow, that the thread on the toggle exits (11 beads from end of toggle).

Stitch through the beads of the toggle to exit the bead highlighted green.

Pick up three beads then stitch through the fourth bead of the stalk.

Pick up three beads then stitch through the eight bead of the stalk.

Pick up three beads then stitch through the twelfth bead of the stalk.

Pick up three beads then stitch through the sixteenth bead of the stalk.

Pick up three beads then stitch through the anchor bead on the end of the rolled edge of the bracelet, highlighted green.

Weave away your thread and finish in your usual way.

Take the thread that you left in position on the toggle, which is now dark pink with the existing stalk thread being now light pink.  Stitch all the way down one side of the stalk to the bracelet.

Stitch through the anchor bead highlighted yellow on the edge of the rolled edge.

Stitch through the bracelet to exit the green highlighted anchor bead.

Stitch up through the other side of the stalk to the toggle, going through the second anchor bead, highlighted green.

Weave away the thread and finish in your usual way.

See next weeks blog post for part 2!


Inspiration: Eggs

When it comes to Easter, chocolate eggs are the first thing many think of.  Certainly I love them!  Eggs are a symbol of fertility and acros...