Friday, October 9, 2020

Tutorial: Bead Slide with Chain to Single Toggle Clasp

Weave any loose ends into the beadwork and finish as you normally would for your choice of thread.  Do not remove the final working thread from the beadwork at this point, in case you need to adjust the bracelet length.

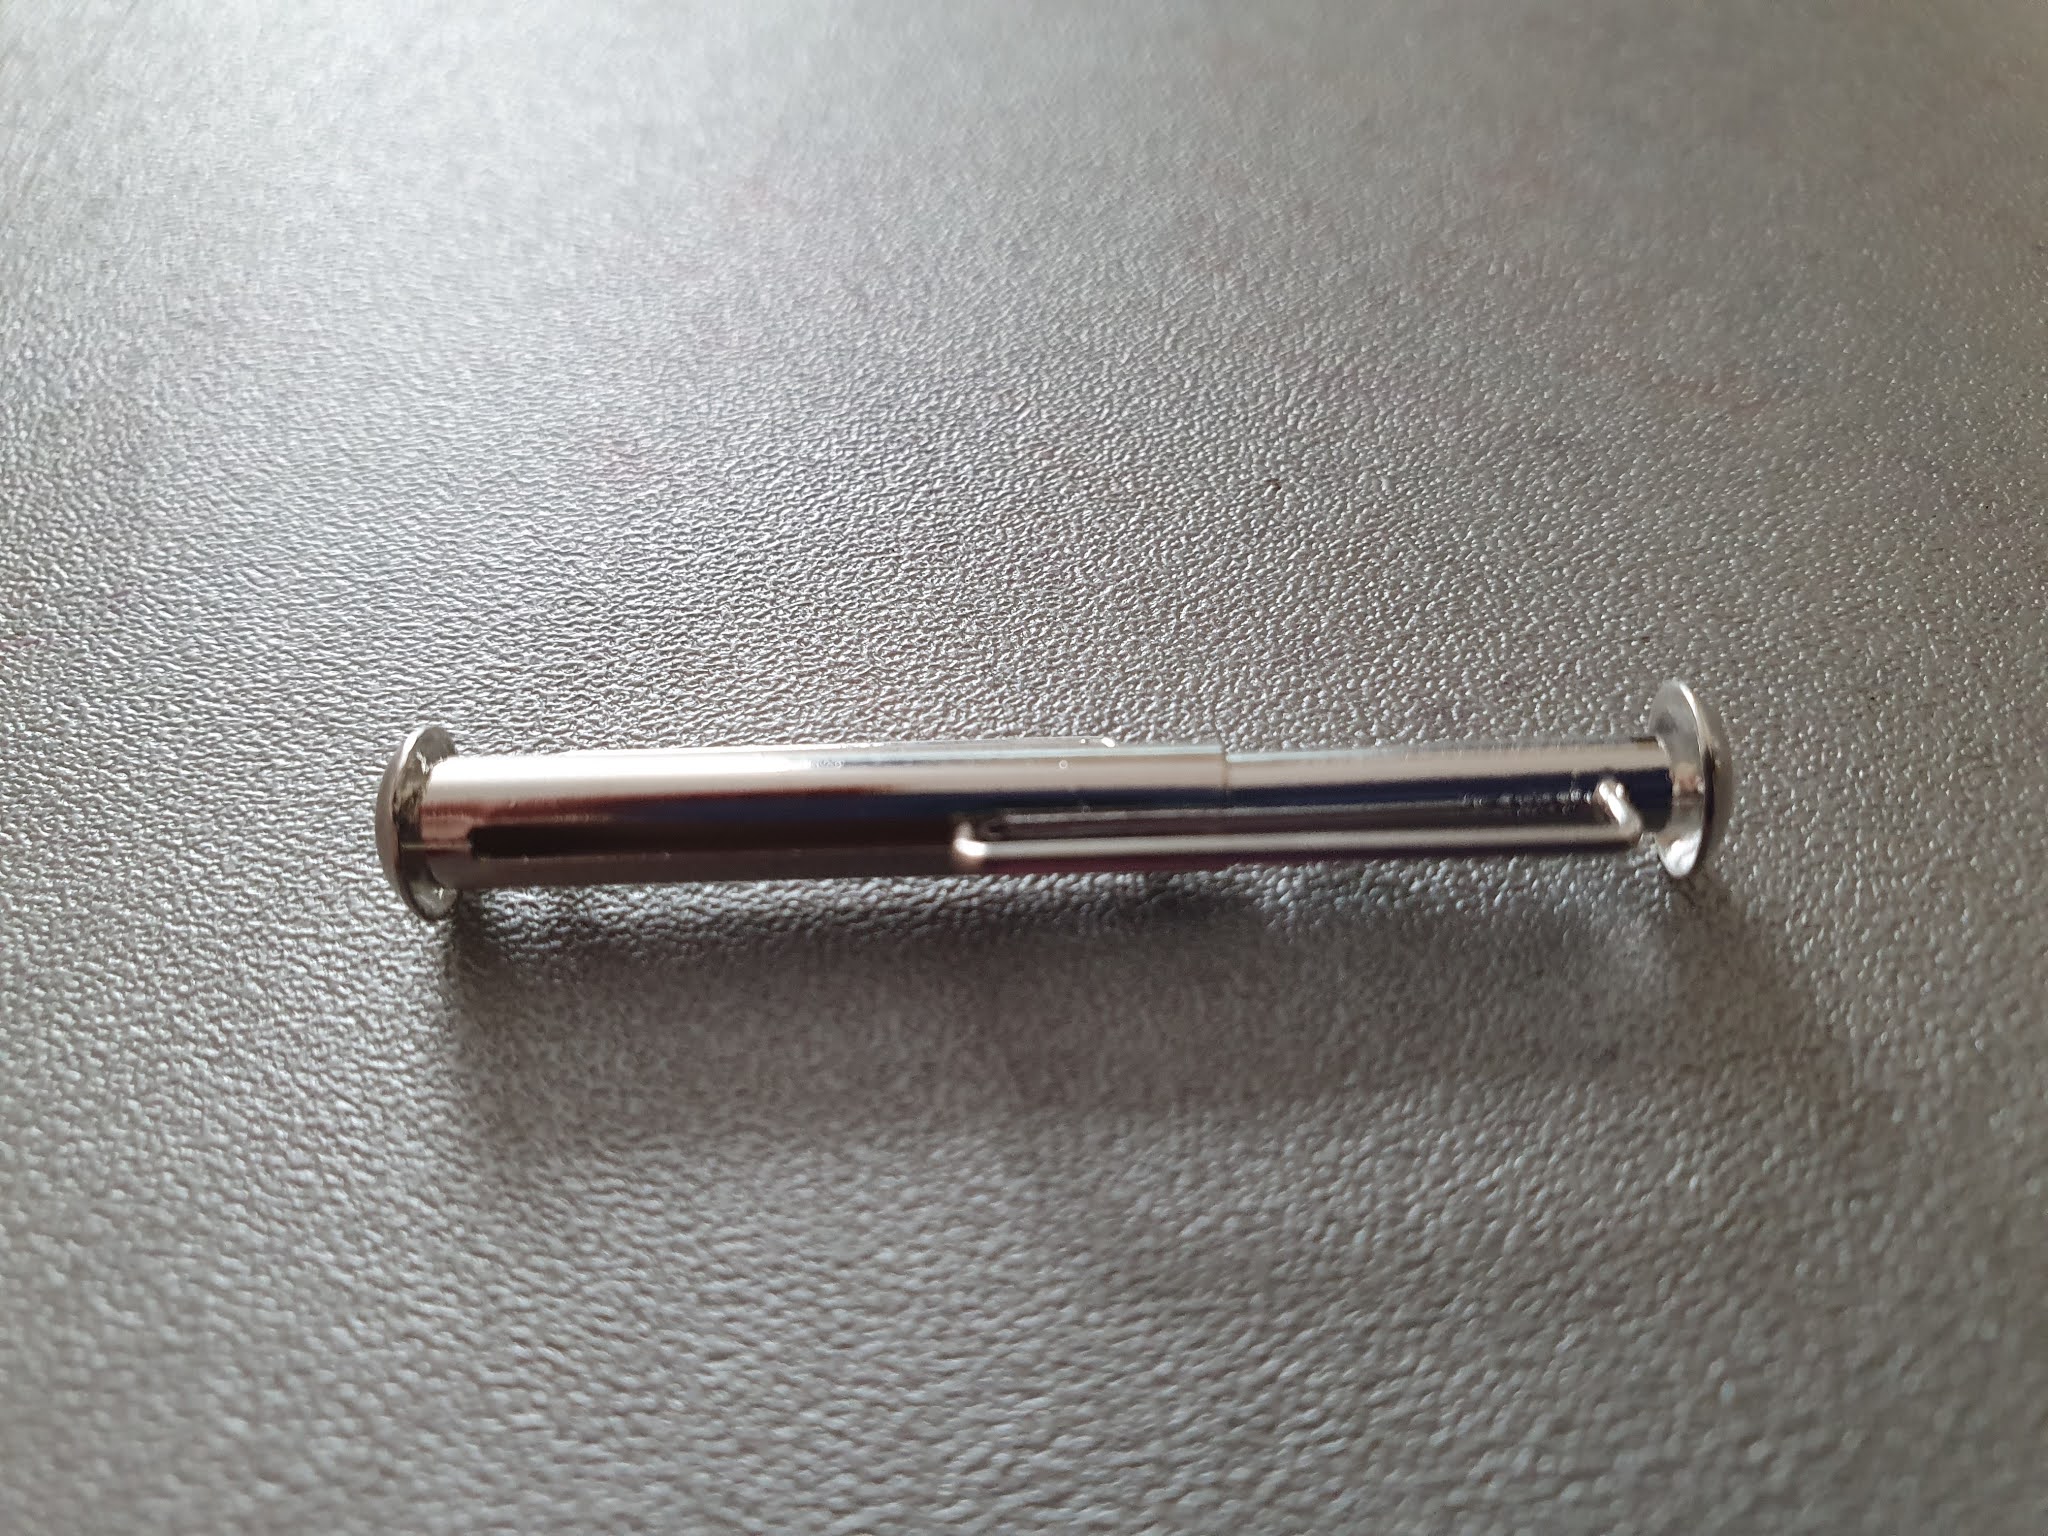
For this bracelet I used two miyuki 35mm bead slides and then attached a toggle clasp with chain.  These bead slides take size 11 beads and I used the same delicas I used for the bracelet.  They also have two attachment loops whereas shorter tubes only have one.

I like to finish the existing thread and begin a new thread for the clasp.  This means that if the clasp thread should wear through, the beadwork will remain intact.

Working at the end marked start in the diagram above, add a new thread and exit the bead highlighted in the close up below.

Thread through to the first bead of the last row (highlighted in blue) and thread through it.

Pick up the first bead slide bead (bead slide beads are shown as being larger to highlight them but all beads used are the same size).

Thread through the previous bead from the original beadwork (highlighted in blue) in the same direction as before (brick stitch).


Stitch through the beadwork to the next high bead (highlighted) and pass the thread through it.

Carry on adding the bead slide beads in the same way across the end of the beadwork and finish the thread off.

The bead slide consists of a tube with a slot in the side.  At the ends of the tube there are bendable flaps.  These tubes have two rings for affixing clasps.  

Make sure one flap is tight to the tube and the other one is open. Slide each of the bead slide beads in to the tube so that the threads between the bead slide beads and the peyote bracelet beadwork fit into the slot.  All the peyote delicas sit outside the bead slide.  Once you have worked all the bead slide beads into the tube, close the second flap of the bead slide.


The beadslides have two rings attached so you can add two catches if you wish.  I decided to attach chain between the two rings using a jump ring, but you can also use a split ring.  Split rings require a special tool to open easily but this means there is no chance of things slipping through gaps accidentally.  If you use jump rings open them with pliers, by moving one end to the side as this does not stretch the ring and allows it to be easily closed by flattening it with pliers.


Thread the chain and one of the bead slide rings into your jump ring or split ring.  Attach a jump or split ring to the main part of the clasp and then thread the chain through the ring attached to the clasp.


Decide how long you want your chain and then use snips to cut it.  Use another jump or split ring to join the free end of the chain to the second bead slide ring.


Add jump or split rings to the toggle of the clasp so that it has enough length to fit up in to the main part of the clasp.  For my toggle I added three rings.  Add chain to the rings of the beadslide in the same way, threading the toggle on before adding the chain to the second ring of the bead slide.


At this point, I like to check the length of the bracelet and ensure it is a good fit, now I know the length of the clasp exactly.  If necessary, add or remove rows with the remaining working thread and then finish the thread.

Add a new thread and brick stitch bead slide beads on to all the high beads on the end of the beadwork in the same way, before sliding the bead slide beads into the tube and sealing it closed.

If the attachment loops to either parts of the clasp are perpendicular to the clasp, the addition of a second jump ring will allow the clasp to sit flat instead of twisting.


Friday, October 2, 2020

Tutorial: Slide Bar Loop Clasp


Weave any loose ends into the beadwork and finish as you normally would for your choice of thread.  Do not remove the final working thread from the beadwork at this point, in case you need to adjust the bracelet length.


Slide bar loop clasps come in a range of sizes and colours but the largest is 31.5mm.  I like these clasps because there is no exposed thread to rub and the attachment is particularly strong as the beadwork is looped around the bar.  I generally only stitch through the join once as it's difficult to get the angle to stitch through a second time once the loop has been made.

I like to finish the existing thread and begin a new thread for the clasp.  This means that if the clasp thread should wear through, the beadwork will remain intact.  This is less necessary for these clasps than for other clasps.

Working at the end marked start in the diagram above, add a new thread and exit the bead highlighted in the close up below.

Pull the beadwork and thread through the clasp.  From this point, the thread is only shown from where it exits the bead as shown by the pink circle.

Take the thread from the bead marked yellow and thread through the bead marked red (or if this is too tight for you clasp, move it down a row to make the loop larger).  This will result in the beadwork folding around the bar as you tighten the thread.  To show the thread path though, I will continue to show the beadwork unfolded.  

Take the thread through the next bead at the end of the beadwork marked yellow and then through the next red bead (on the same row as the previous red bead which is now marked pink).

Keep going, taking the thread through the next yellow bead at the top and then back down to the next red bead.  Past yellow beads are shown as blue and past red beads are shown as pink.


At the end, there is no red bead on the same row so take the thread through the red bead shown below in order to attach the corner of the beadwork to the edge so there is not a loose edge to catch.


The beadwork should now be fully folded to make a loop and it should be nice and tight so the join is less obvious.

The last yellow bead is now right on top of the last red bead in the diagram.  The thread path of the join is shown below.

You can either take the thread through the join a second time or finish off the thread.

Add the second half of the clasp to the other end of the beadwork in the same way.  Try to make sure the joins are both on the same side as this is the back of the bracelet as the pattern does not continue perfectly where the end joins to make a loop.  


The two halves of the clasp slide together.


Friday, September 25, 2020

Tutorial: Toggle Clasp #1


Weave any loose ends into the beadwork and finish as you normally would for your choice of thread.  Do not remove the final working thread from the beadwork at this point, in case you need to adjust the bracelet length.

For this bracelet I used a copper toggle clasp and connected it to the beadwork using beaded loops. This version is based on a piece of beadwork with 28 columns of beads but can be adapted for pieces with multiples of 4 columns, so 4, 8, 12, 16,20, 24, 28 etc.  In this design,  the beaded loops twist slightly to allow the clasp to lie flat.

I like to finish the existing thread and begin a new thread for the clasp.  This means that if the clasp thread should wear through, the beadwork will remain intact.

Working at the end marked start in the diagram above, add a new thread and exit the bead highlighted in the close up below.

Thread through to the first bead of the last row and thread through it, keeping threading through until the thread exits the beadwork as shown below for a piece of beadwork 24 columns wide.  

For beadwork of other widths, look at the high beads at the end of the beadwork, identify the two middle high beads in the row, the loop will be anchored to the high beads adjacent to these two middle high beads.

Pick up twelve beads, I picked up 2C, 2D, 2A, 2B, 2C, 2D but you can change this as required.

Thread the main part of the toggle clasp onto the thread so that the beads pass through the hole of the clasp.  If necessary, add a jump or split ring between the beads and the clasp if the hole in the clasp is too small for the beads to pass through.  Stitch back into the main beadwork as shown below, so that beaded loop is formed with the clasp on the loop.  It’s better to have the clasp connecting on to the beads than on to the thread as the beads will wear more slowly than the thread.

Stitch through to the end of the row.

Stitch back through the beadwork and go through the loop again before going to the end of the row and then finishing the thread as you began.  The thread path is now shown in blue.

At this point, I like to put the two halves of the clasp together and check the length of the bracelet.  If necessary, use the working thread to add more rows and then finish the thread.

*   *   *   *   *

Add a new thread to the other the other end of the beadwork to add the toggle of the clasp.

Stitch through the beadwork until you exit it as shown below for beadwork 24 columns wide or from the two middle high beads.

Add sixteen beads to the thread.  The toggle needs to have enough length to reach through the main part of the clasp.  I added 2C, 2D, 2A, 2B, 2C, 2D, 2A, 2B but this can be altered as required.

Attach a jump or split ring to the toggle (mine came with one attached).  Pass the needle through the ring and then pass the needle back in to the main piece of beadwork as shown below.

Split rings require a special tool to open easily but this means there is no chance of things slipping through gaps accidentally.  If you use jump rings open them with pliers, by moving one end to the side as this does not stretch the ring and allows it to be easily closed by flattening it with pliers.

Thread through to the end of the row.

Take the thread back through the beadwork, going through the bead loop a second time before finishing the row and then finish the thread.  The thread path is now shown in blue.


Inspiration: Eggs

When it comes to Easter, chocolate eggs are the first thing many think of.  Certainly I love them!  Eggs are a symbol of fertility and acros...